- Category
- What's New?
- FightSticks/Pads
- Joysticks
- Pushbuttons
- Spare Parts & Tools
- Hardware & PCB
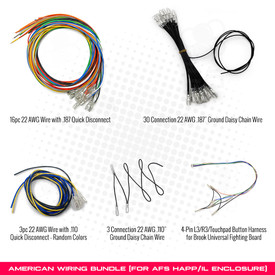
- Electrical
- Customize
- Merchandise
- Sales & Clearance
- Brand


AFS 14" Happ/IL Steel Case, Custom Art/Plexi Bundle
Rating
Price:
$159.95 (USD)
Brand
SKU
CUSTOM-BNDL-HAPP
Weight
0.00 Ounces
Availability
Ships within 1-2 business days
Shipping
Calculated at checkout
Choose Your Options
-
Product Description
This is a DIY Kit
The AFS bundle is designed as a build-yourself kit. This iwill not come pre-assembled with any of the additional items you purchase, such as wire, PCB, joystick lever or buttons.
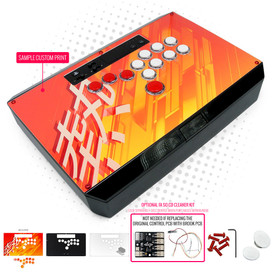
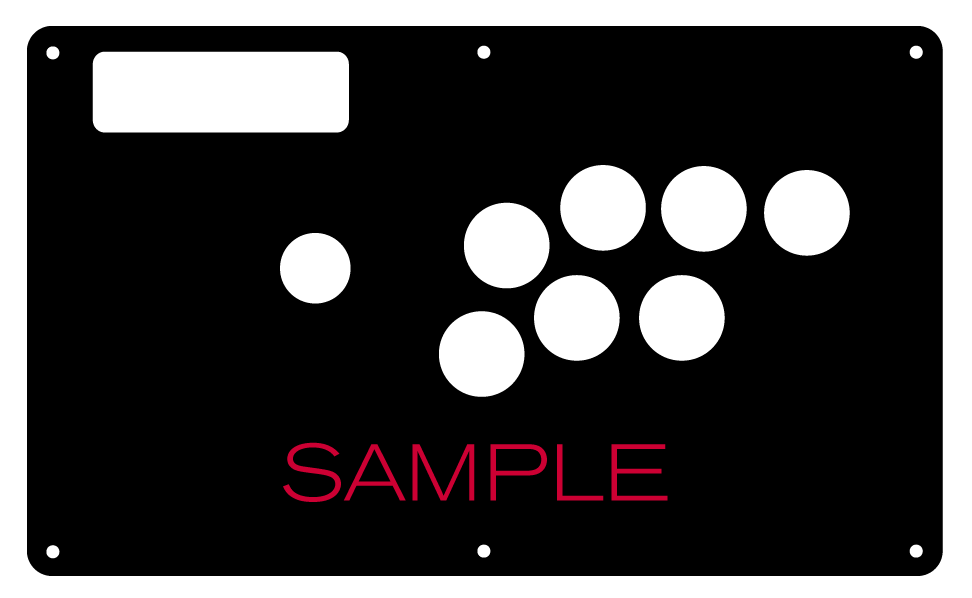
Relive your days of classic Street Fighter, Marvel vs Capcom 2, and countless other titles with the retro-minded AllFightsticks Happ/IL steel fightstick enclosure!
Suzo Happ and Industrias Lorenzo (IL) Compatible
This sturdy steel enclosure was designed with a higher clearance to accomodate the larger Suzo Happ Competition or Industrias Lorenzo Eurosticks, plus taller 28mm screwbuttons with Cherry microswitches.


Enclosure height is taller than normal AFS 14 to accomodate IL EuroStick or Happ Competition Joystick, plus tall 28mm Happ or IL arcade buttons. To install the joystick lever, remove the nylon nuts from the joystick mount using our 8mm-5/16 Hex Nut Driver for AllFightsticks Case or equivalent tool. Your Happ or IL joystick lever mounts like this. Now you can finish assembling the lever or add connectors and wiring. Also Works with Sanwa JLF and 30mm Buttons
Included in the case are holes designed to work with Sanwa JLF compatible mounts. Simply unscrew the included mounts using our 8mm-5/16 Hex Nut Driver for AllFightsticks Case or equivalent tool, then move the screws to the JLF mount position. 30mm snapbuttons or screwbuttons are also compatible.
Provided with the case is a convenient PCB stand that works with most Brook form factor control PCBs. In the back, you will find six 24mm (6) option button holes and three (3) neutrik holes with mounting screws for expansion.


 Crown joystick lever with compatible mounting plate. For other joysticks not usually compatible with either mount, you may consider purchasing the KOWAL Flat Plate Converter.")
To install a Sanwa JLF or similar lever, Remove the nylon nuts from the joystick mount. Next, use the same tool to remove the second nut and washer. Here, you will remove the screw from its current outer mount holes and move it to the inner mount holes. Using a Phillips head screwdriver and the hex driver, screw the second nut and washer so that both a tight against the mount hole. The JLF mount screws will look like this when you are finished. Now you can install the JLF, Seimitsu or low profile (low collar, not high collar) Crown joystick lever with compatible mounting plate. For other joysticks not usually compatible with either mount, you may consider purchasing the KOWAL Flat Plate Converter. Back Panel Uses 24mm Pushbuttons
The AFS/Happ Enclosure's backside utilizes 24mm pushbuttons. This allows up to 6 option buttons for modern day control schemes, such as Share, Back, Start, L3, R3, and Touch Pad Press. The back also includes 3 Neutrik ports for additional options such as a NAUSB passthrough, a rocker switch to turn on/off "tournament mode" (prevents accidental option button press), or 3-way rocker switch for DP/LS/RS (Digital, Left Analog Stick, Right Analog Stick) activation. Screws for the three neutrik port are included with each case.

Save When You Bundle
The AFS IL/Happ is already a great economical solution compared to other Happ/IL compatible cases available today. This bundle saves you over $40.00 by providing the following in one neat package:
- AFS 14" Happ/IL Steel Enclosure ($99.95 value)
- Choice of "Capcom 8" or "Sega 2P 8" steel panel (while supplies available) ($29.95 value)
- Plexiglass top ($16.95 value)
- Personalized artwork print and cut to your specifications (15.95 value)
- 14" Blank Foam Bottom 4mm thick Pad ($14.95 value)
- Black hex screws with hex key ($4.25 value)
- Additional Neutrik screws
- PCB compartment
- Suzo Happ/IL Button Wrench ($4.95 value)
- Buttercade 24mm and 30mm SnapOut pushbutton removal tool. ($16.00 value)
- Brillianize Instant Detailer Pack For Plexiglass ($1.50 value)
You can use those savings towards the purchase of a Brook control PCB and wiring to get started on your custom build.
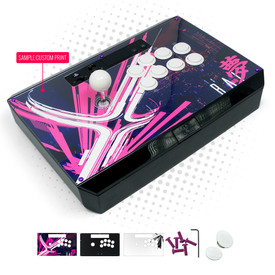
Free Artwork Packs
Relive some of the best arcade years with these picture-perfect artwork packs designed for the Happ/IL case, yours free to download. Each are courtesy of Twitter's @GStickart.
 If you desire, upload the PSD template you want printed with your order of the Happ/IL kit. Instructions to modify and upload the packs are below.


Champion Edition Theme
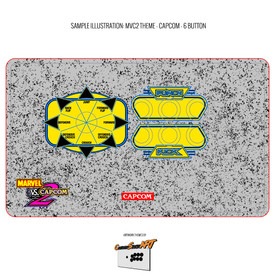
(Capcom, Sega 2P layouts, 6 or 8 button)MVC2 Theme
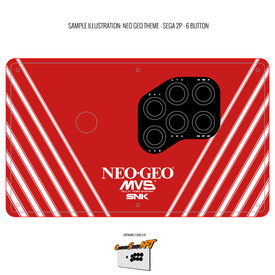
(Capcom, Sega 2P layouts, 6 or 8 button)Neo Geo Theme
(Sega 2P layout, 6 or 8 button)

Astro City Version 1 Theme
(Sega 2P layout, 6 or 8 button)Astro City Version 2 Theme
(Sega 2P layout, 6 or 8 button)Artwork presented for display purposes only How to Modify the Free Artwork Packs
- Each free artwork theme pack is compressed into a zip file. Use an unzip application like Winzip, 7Zip or similar to de-compress the contents.
- The templates included are either 6 or 8 button, with some including Capcom style straight 6 or 8 button, or Sega 2P layouts. Choose the one that matches your desired HAPP/IL metal panel layout.
- Each template is saved as a Photoshop PSD. If you own Adobe Photoshop, you can open the PSD file directly. Can't afford Photoshop? Use Photopea, a free, online Photoshop alternative that works great with PSD files.
- Each Photoshop file contains multiple layers and one "Group" layer called "Labels". In Labels, you can choose which set of button labels you want, such as KICK PUNCH, or Playstation, Xbox or Nintendo Switch). This may vary per theme.

- When you're happy with your layout choices, save the file as PSD. Do not save as any other format.
- When you are ready to place your order for the AFS 14" Happ/IL Steel Case, Custom Art/Plexi Bundle, you will visit the section under under "Choose Your Options". Upload this file under the option "Submit Artwork - .PSD (Recommended), .TIFF, JPG, PDF or PNG format:".
")
Option Guide Often, you will have several options to personalize your control panel. Note: Not every option will apply to your Fightstick model.
CUT BUTTON INSERTS | HOLOGRAPHIC PATTERNS
Layout Configuration
Each Fightstick has its own characteristics, with some sharing similar elements, such as the popular Vewlix button layout. We will specify what options are available for each Fightstick. Below are the most common button layout configurations:
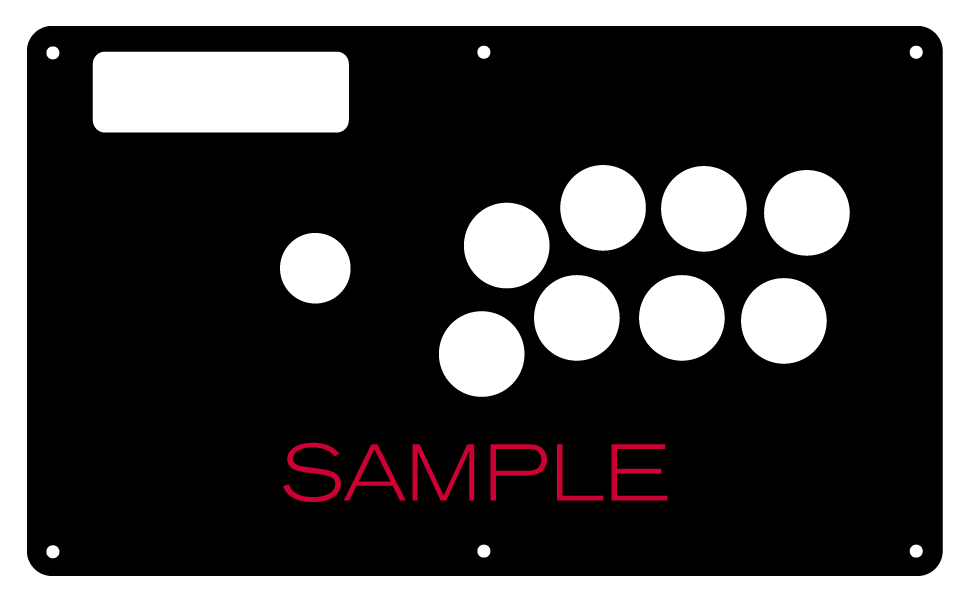
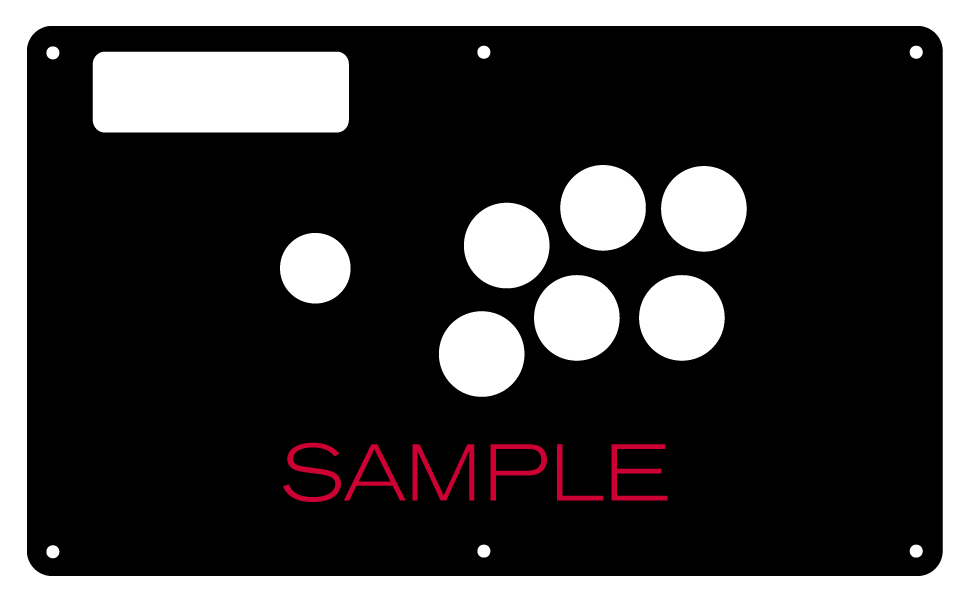
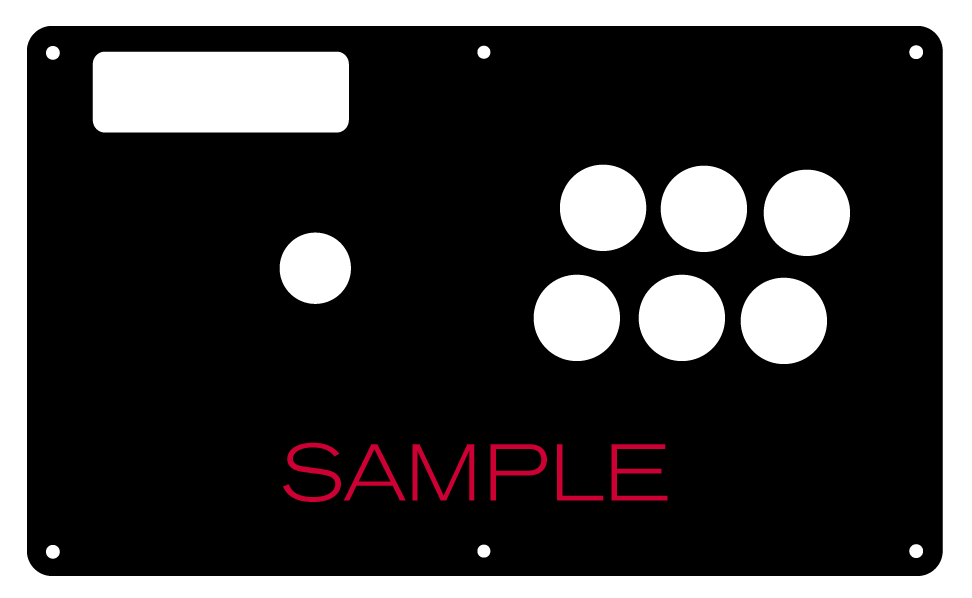
 8 Button VewlixFirst 6 ButtonsLast 6 Buttons7 Button Vewlix
Removing Default Elements
Some Fightsticks, such as the popular MadCatz TE, offer additional personalization options by removing default elements such as control panel, start button, or screws. Cut options are defaulted to their authentic counterpart, displayed as [YES (default)] in the options list. For example, a MadCatz TE, the default configuration is to have the turbo/guide portion of the control panel cut, so that the control panel can fit properly. You have the option to select [NO] to prevent cutting these areas.
![Cut Control Panel? [NO]](http://support.focusattack.com/attachments/token/ioB7e1jzIXfxKdM8KJPKKzvKD/?name=sample-8button-noturbo.png)
![Cut Start Buttons [NO]](http://support.focusattack.com/attachments/token/SWbsx5sVHYupnBQ5iuZH1S2HK/?name=sample-nostart.png)
![Cut Middle and/or Bottom Screws? [NO]](http://support.focusattack.com/attachments/token/QzFj5pc5cNNHkOKrzlEMcc0I4/?name=sample-8button-nomiddlescrew.png) Cut Control Panel? [NO]Cut Start Button? [NO]Cut Middle and/or Bottom Screws? [NO]
Cut Control Panel? [NO]Cut Start Button? [NO]Cut Middle and/or Bottom Screws? [NO]
Cut Control Panel? [NO] - If you own a MadCatz TE, and installed a PS360+, you may no longer need the Turbo/Guide area of the control panel, located at top left. This option allows you to remove the Turbo/Guide portion. Please note that you MUST remove the actual control panel on the TE by unscrewing it before applying the plexi, or you risk damaging the plexi. Also, please make certain to select this option if you are also choosing to have artwork printed, or the plexi and artwork won't match.
Cut Start Button? [NO] - On some joysticks - such as the Qanba Q4 - the start button is directly on the panel. You can select to have this removed. You can also select this should you desire a panel similar to the Eightarc Fusion or Synthesis series Fightstick, as the start button is moved elsewhere. Again, this option is available on specific joysticks.
Cut Middle and/or Bottom Screws? [NO] - Selecting "no" on this option allows you to remove the middle top and bottom screw holes on specific joysticks, either for a cleaner appearance or to avoid rubbing your wrist against the screw. Please reconsider this option if you intend to have a full panel etch on your plexi, as etching physically changes portions of the plexi due to heat. In this case, it is best to leave the screw holes in place in order to keep the panel securely positioned.
Cut Button Inserts

Pushbutton manufacturers such as Sanwa, Seimitsu, Crown and GamerFinger have each produced specific models with a clear or translucent plastic cap and flat plunger. These are often used to display a graphical insert, allowing you to enhance the button's appearance. That said, each button manufacturer has designed the artwork cap with a different diameter than their competitors. For example, GamerFinger's artwork cap has a diameter that is slightly larger than Seimitsu or Sanwa. An insert cut for a Sanwa artwork cap will fit loosely when inserted into the GamerFinger artwork cap. This is an undesirable result that can produce a white or colored ring around the insert.
Now, you can choose the button insert cut to match the pushbutton you intend to use. This allows the insert to fit snugly within the cap.
Brands and Model with Artwork Caps
- Sanwa - OBSC (30mm) | OBSC (24mm)
- Seimitsu - PS-14-GN-C (30mm) | PS-14-DN-C (24mm) | PS-14-K (30mm) | PS-14-KN (30mm) | PS-14-DN-K (24mm)
- Seimitsu - ALUTIMO SSPS MX 24mm and 30mm
- Crown - SDB-201-C, SDB-202 MX (30mm) | SDB-202-MX (24mm)
- Qanba - GRAVITY 24 and 30mm
- GamerFinger - HBFS30 (30mm) |HBFS24 (24mm)
In some instances, a button brand or model does not have a 24mm equivalent with art cap. In this case, we will cut to the default size of Sanwa 24mm insert.Please note that if you later intend to purchase a different button, you may need to get new button inserts or new artwork. If you are uncertain which button you may choose, Sanwa is chosen by default.
Button Cut for Qanba Q2 Glow
 Qanba Crystal and Q2 Glow feature buttons manufactured by Qanba. These buttons have a smaller cap diameter, and thus require a smaller artwork insert. If you plan to keep the Qanba Crystal or Q2 Glow buttons installed when updating your artwork, please choose the option "Crystal/Q2 Glow".
24 vs 30mm
When processing orders, a frequent mistake we found among new players is choosing the wrong size for action buttons, such as punch and kick.
Within the fighting game genre, Japanese arcade buttons commonly consist of two diameter sizes: 24 millimeter and 30 milllimeter (mm). In most configurations, 30mm represents your action button. These are front facing, appearing most prominent on your Fightstick control panel. Option button, such as "Start", "Select", or more recently "Option", "Touch", or "Share" are usually 24mm.
UPDATE: Owners of Neo Geo AES Joysticks will need 24mm pushbuttons instead of 30mm (Thanks SRK's DEZALB)
Below is a visual representation of a common Fightstick control panel. Throughout this article, we will mark 24mm in green, and 30mm in Orange.

Checking the Proper Size
 Another way that players can misinterpret the pushbutton size is by measuring the pushbutton plunger. Have a look at the diagram at right.
The plunger - the part that you press down to represent an input - is 25mm or a bit smaller in most 30mm pushbuttons. Often this leads to the conclusion that one needs a 24mm button and not 30mm.
Similarly measuring the button rim can lead to confusion, as it is intentionally larger than the button hole it is placed in. You don't want to use these measurements. Instead, review the button housing diameter, or the hole the button will be placed in. You can do this with a caliper - a digital caliper is often quite helpful for this and other arcade-related projects.
Control Panel Configuration
Most Fightsticks from MadCatz, Hori, Qanba, and similar will use these two sizes. How the buttons are used will depend on the model joystick that you own. Over time, we'll provide example configurations for specific popular Fightstick models and arcade cabinets using the color key for 24mm (green) and 30mm (orange). We'll also expand the key for future models if another size is introduced, and we offer for sale.


Holograph Patterns
The following patterns are available. Artwork is printed atop the pattern and its color changing effects will appear underneath.
")

 No Pattern (Rainbow)Dots: DonutsDots: Dots Lite

 Dots: Space DotsDots: Little BoxesDiagonal: Static Storm

 Diagonal: ThatchedVertical: Pillars of LightHorizontal: Tinsel

 Texture: Texture 2Texture: Magnetic FurTheme: Cannabis

 Theme: VortexWavy: Moon LavaWavy: Swirl 3
Image Edit If you would like to use a free, online Photoshop-like app to check out whether your artwork will work with a layout we offer, I highly recommend Photopea
 This amazing app works with our PSD templates and is a great way to preview your artwork or create new art files. It also exports to PSD, which is the format we recommend for submitting artwork.
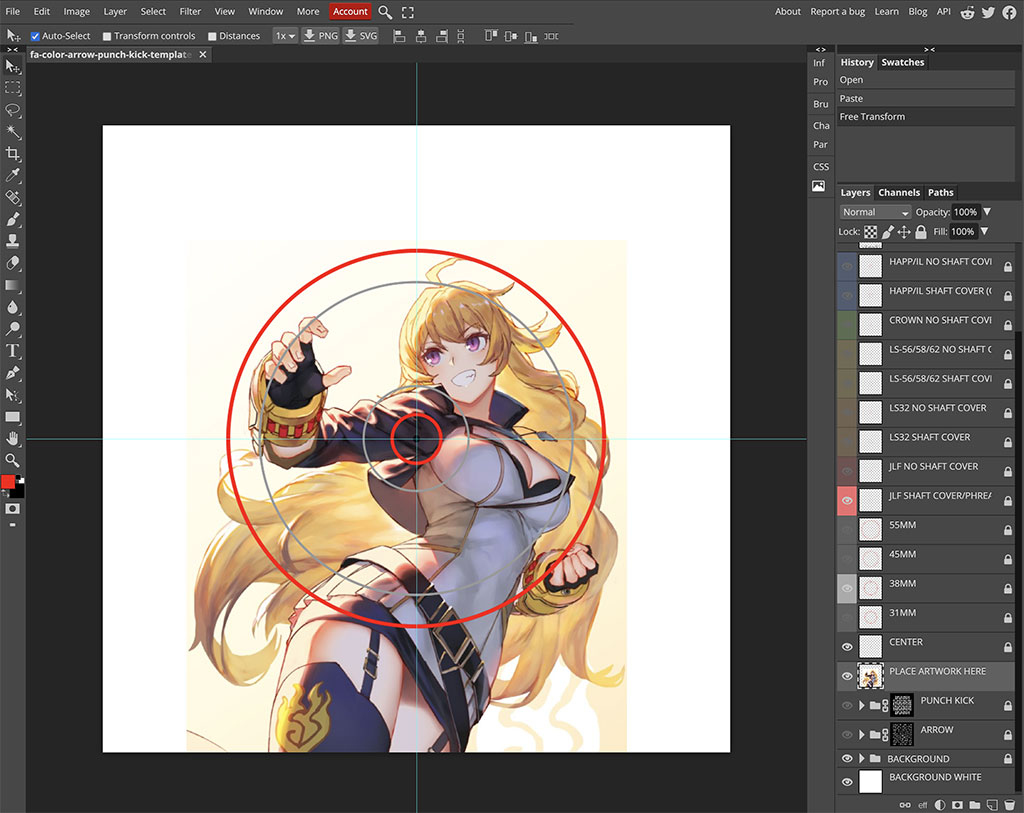
Support New to FA Plexworks?
Click the "Options" tab for a detailed explanation of each customization option available to you. Using a mobile device? Click here to scroll to the descriptions.
Artwork templates
We offer a photoshop template for each custom artwork or custom plexi etch. Click the "Description" tab (or scroll up if on mobile device) to display the template and download. You can also click here to access our repository and download artwork and etch templates (in Photoshop PSD format) for your desired model and others.
Important: Using templates outside of the ones we provide may produce unwanted output. We are not responsible for output generated from unsupported templates. More information here.
Warranty and Support for FA Plexworks Custom Order
Custom orders cannot be returned for refund, or exchanged for another custom order. Orders damaged upon arrival are subject to special terms within our return policy. Please see our FA Plexworks FAQ for more information about our Plexworks return policy and related Q&A.
If you have not used our Plexworks custom services before, we recommend that you visit our support section for updated information, helpful tips, and resources to get the best output.
Some useful sections to review before making your purchase (will open in new browser window or tab):
- Learn about our Custom Job Tracker to keep tabs on your custom order while staff processes it from start to finish.
- Save time getting answers by visiting our FAQ.
- Learn more about the personalization options available to you.
- Hire a skilled artist from the Fightstick Artists Network to visualize your idea.
- Handling the artwork yourself? Review our requirements and get tips to optimize your laser etch or artwork submission.
- Learn about additional products and services we offer under FA Plexworks.
-
Product Reviews
-
Living the Arcade Dream, Courtesy of FocusAttack & AFS!
Having a proper, American style arcade stick has been a dream of mine for a long, long time. I've never really done well with the standard Sanwa JLFs, causing me to steer more into korean lever territory. Thanks to FA and AFS, my dream is now realized.
The case itself is well constructed, even compared to other sticks that also use a powder brushed steel. Assembly was easy with the proper screws and sensibly arranged mounting brackets. At 14 inches, this is a heavy case that's wide enough to comfortably distribute all that weight. Unlike some other steel cases (see: The Etokki Omni), it wasn't a lot of weight concentrated on a small surface area. Additionally, the push-button holes were perfectly sized. You wouldn't think this would be an issue, but I tend to use transparent pushbuttons, as to not interfere with the art so much. Others (again with the Etokki Omni) would see the push buttons turn over a period of time, forcing me to use my fingers to turn it back so the graphics were properly aligned. But I haven't had to do that with the AFS! This is probably going to be the tallest case you ever worked with, but not much taller than say... the Razer Panthera or Nacon Daija.
Finally, as a general tip, the IL Eurojoystick is much more sensitive than I expected. If I went for a cardinal direction and was off by 10 degrees, I'd trigger another switch and get a corner input. This resulted in a lot of input errors, and accidental flick-DPs. If you're interested in the Eurojoystick, I highly recommend that you make sure you have a dremel on hand to sand down the pins on the switch and reduce that sensitivity. GTCvDeimos on Aug 10th 2023
-
-
Find Similar Products by Category