- Category
- What's New?
- FightSticks/Pads
- Joysticks
- Pushbuttons
- Spare Parts & Tools
- Hardware & PCB
- Electrical
- Customize
- Merchandise
- Sales & Clearance
- Brand


-
Product Description
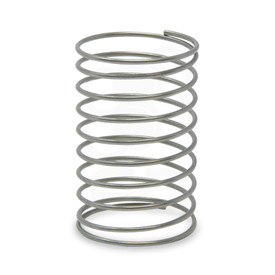
Manufacturer Seimitsu is well known for the PS series pushbutton, whose microswitch differentiates itself by requiring just a bit more force to actuate. The MM9-3 spring adds an extra .13 LBF (pounds force) to Seimitsu's 30mm pushbutton series. This is desirable to some who appreciate a slightly more deliberate input force and a bit less sensitivity than Sanwa's SW-68 offers.
Adds .13N for Total of 1.13N (0.254 LBF)
By default, Seimitsu microswitch requires 1.0N or 0.2 LBF (pounds force) to each button. The MM9-3 adds .13N, for a total of 0.254 LBF. The result is a light but firm button input requirement and quicker return to neutral.
Compatible With Seimitsu 24mm and 30mm (PS-14-Dx/K/PS-15) Pushbuttons
The MM9-3 is designed to install into the following Seimitsu PS series pushbuttons that use the Seimitsu PS-14-D Button Micro Switch.
Install Notes
While this does not represent the only way to install the spring into the pushbutton housing, you can use these notes to assist you during the install.


To remove the cap from housing, use a mini flat head screwdriver or similar small, flat surface tool to wedge inside between the open spaces on each side of the button. There, you will press upward against the cap's internal tab, dislodging it from the housing. You may need to alternate the upwards push of each tab to prevent the opposite tab from falling back into the open space.
With the cap removed, simply place the spring on the microswitch.
Note that this is an example photo, and your chosen spring may look different depending on the model.
You can place the cap back on the housing, lining up the plunger's slotted bottom opening with the microswitch. The plunger can only sit properly on the microswitch one way, which should ease the process of sitting the plunger and cap onto the button properly. The finished result looks like the picture above.
Note that this is an example photo, and your chosen spring may look different depending on the model.
-
Product Reviews
-
Great Springs for those that want a bit more force.
A lot of people like the more lighter tension Sanwa buttons. I am not one of those people. I prefer seimitsu buttons which require a tad bit more force to press. Recently, however, the stock buttons were starting to feel lighter to me after a couple years of use. That’s when I decided to give these springs a shot.
I was on the fence about getting springs as I heard they make the buttons a lot harder to press. I opted to get the lightest tension for my seimitsu ps14-k 30mm buttons to test it out. I’ve been using them for over a month now as of the time of this review and I can say they definitely provide that little bit of additional force I wanted in my buttons. It’s a slight but noticiable difference and may take a small adjustment period. Unless you know for sure you like really heavy button presses, I would definitely recommend getting this particular tension (.13n) if you want more force in your seimitsu buttons. I feel like it should be enough for most people.
I definitely love them and will use these from now on in all my arcade sticks! Unknown on May 19th 2024
-
-
Find Similar Products by Category