- Category
- What's New?
- FightSticks/Pads
- Joysticks
- Pushbuttons
- Spare Parts & Tools
- Hardware & PCB
- Electrical
- Customize
- Merchandise
- Sales & Clearance
- Brand
4-Pin L3/R3/Touchpad Button Harness for Brook Universal Fighting Board
-
Product Description
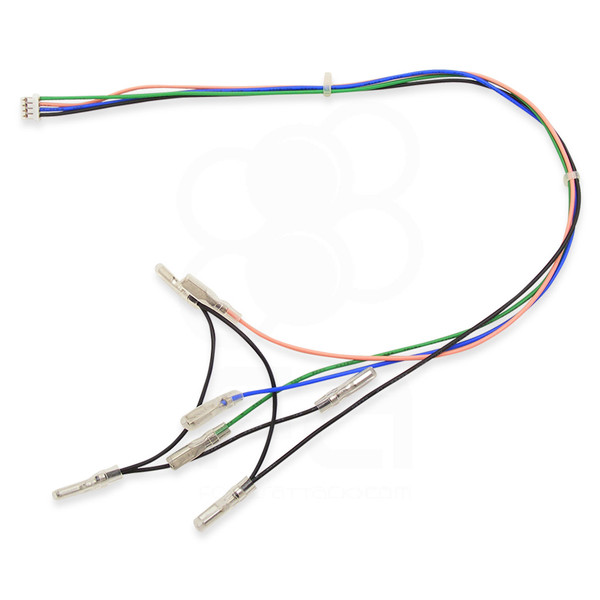
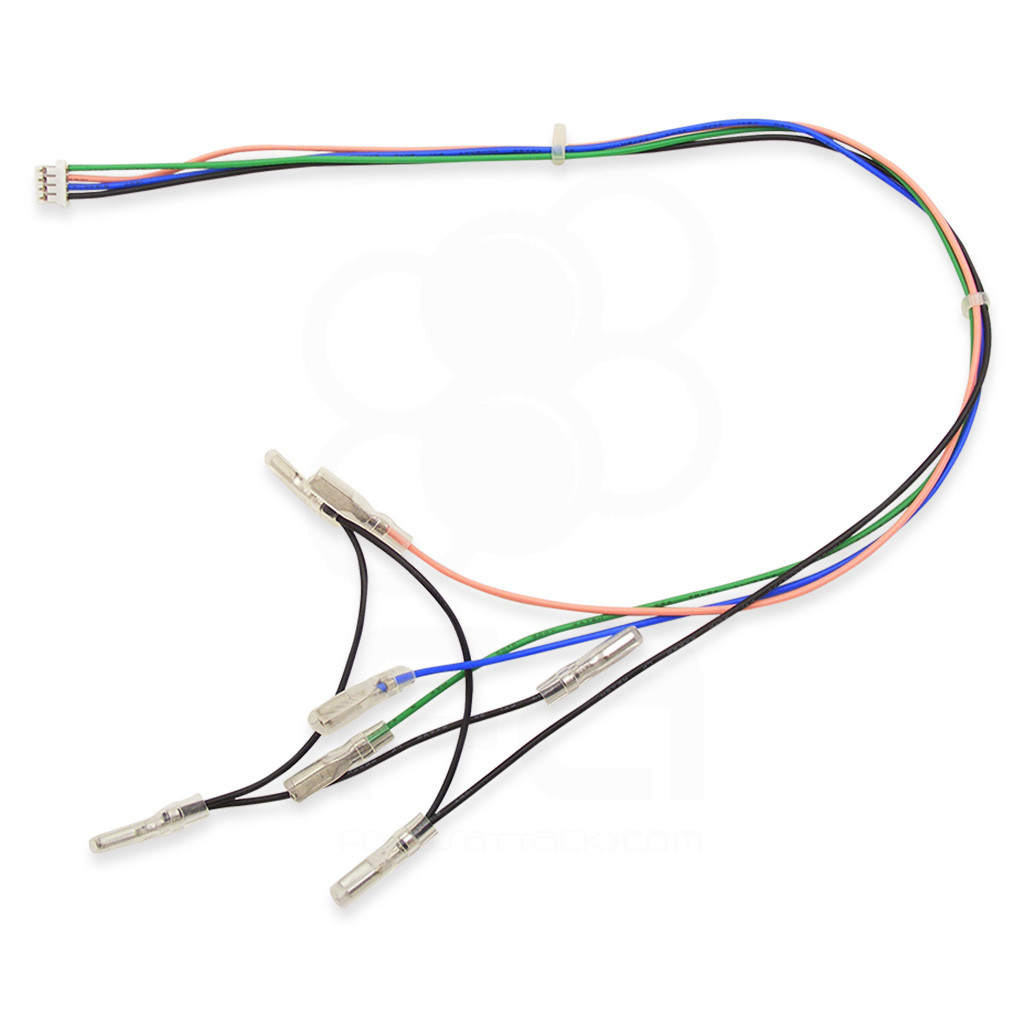
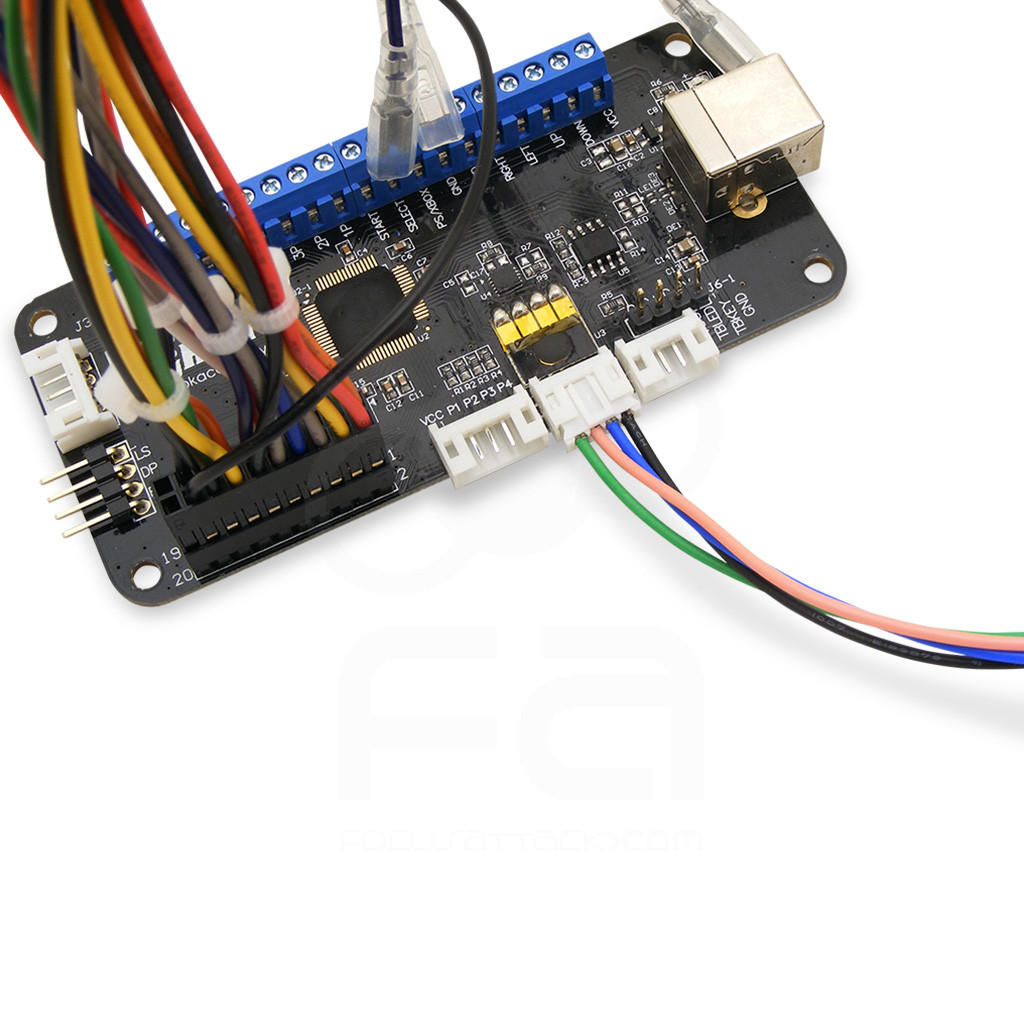
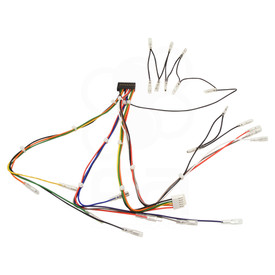
The Brook Universal Fighting Board with Headers or Brook PS4+ Fighting Board with Audio v2017 (PS4/PS3/PC) offers control of Sony Playstation 3 and 4's L3, R3 and touchpad key buttons, a unique feature of these control PCBs. This harness plugs into the JST connector to allow control of these buttons.
Left Analog, Right Analog, and Touchpad Key
The Sony Playstation 3 gamepad offers a left analog and right analog button. These are activated upon pushing in on the analog stick. The Playstation 4 introduced the touchpad, which is used for analog motion much like a mousepad. This also contains a button that you can push in. Street Fighter V utilized the Touchpad button for some features in training mode, among others. That is why the touchpad key is represented by a button control on Brook control devices such as the Universal Fighting Board and PS4+ with Sound.
With the 4-pin harness, you can now access those buttons. The .110 female connector will fit most Japanese style pushbuttons with a .110 terminal. The harness also possesses a 4 connection daisy chain that serves as a ground for each button.
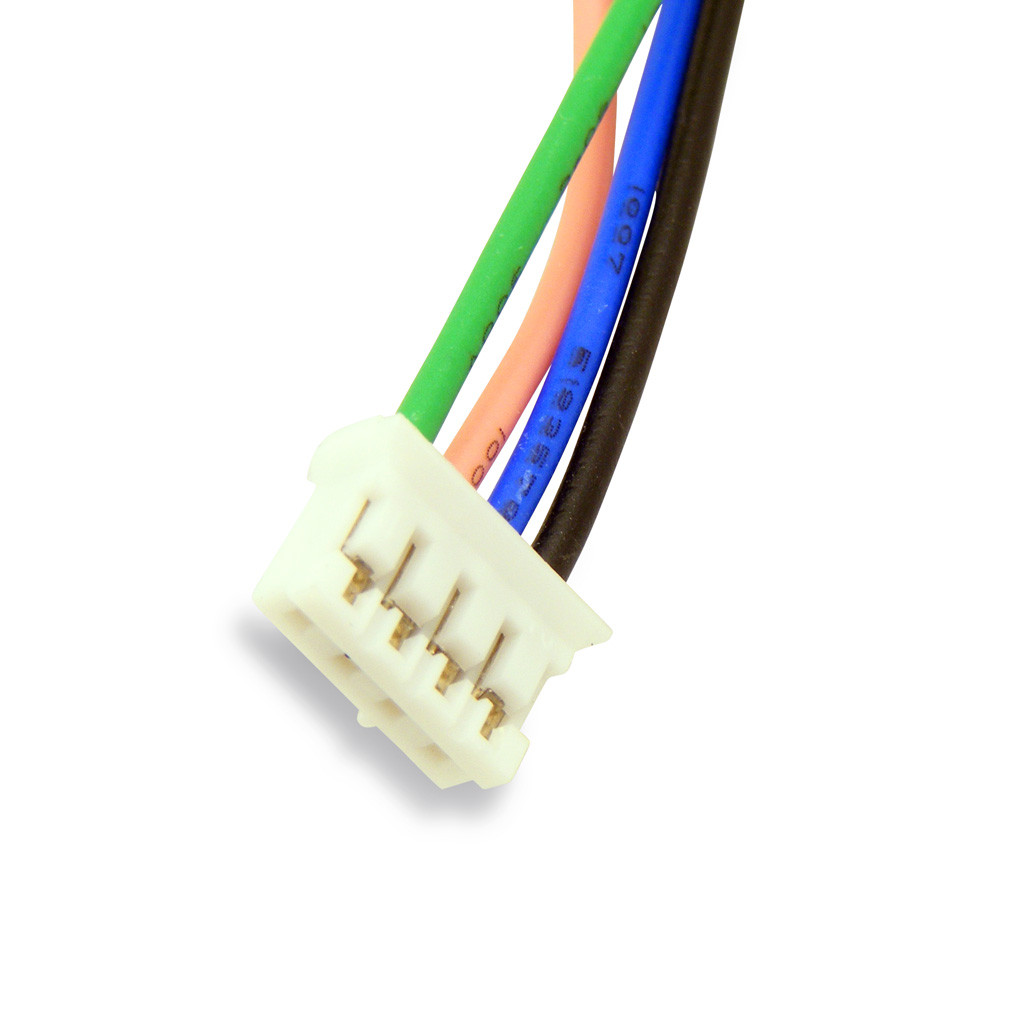
Support The 4-pin connector is keyed, meaning it has grooves to prevent it being put on the wrong way. The only way it could be put in incorrectly is if the header was soldered on upside-down. The color guide below shows the color for the input signals for each button. The 4-pin has been given an extra ground connection to allow for custom builds requiring more space or perhaps the ground can provide button coverage out of reach of the main harness. If not needed, the excess quick disconnect can be unused or cut.
Much thanks to Joey Wainwright of 801 Mods for the original article.


See pictures below of an example setup of the 20-pin + .187 conversion harness and 4-pin harness in this Korean setup.
-
Product Reviews
-
This is the harness you need to add Turbo button/Turbo LED for your PCB
NOBODY makes a pre-made 4-pin harness for Turbo LED and Turbo button/key support.
You have to make your own!
Luckily, you can buy the existing L3/R3/Touchpad Button (4-pin harness) and modify it for Turbo support.
Turbo-button support is easy. If you're using a 24- or 30mm button for a Turbo key, leave the 0.110 quick disconnects attached on the 4-pin harness. Those will be the 2 signal lines on the right half of the harness (looking down on the harness as it plugs into your PCB). Double-check against the PCB diagrams for Brook PCBs (PS3/PS4 Fighting Board +, Brook UFB, Brook Zero Pi, Pico Fighting Board) and you'll see what I mean.
The Turbo LED is another problem. You have to snip off the 0.110 quick disconnects on the left-half of the harness. Those two signal lines will require about 1/4 inch of insulation stripped and they'll have to be soldered onto the LED's legs directly.. You can't get around soldering the signal line to the LED; you need to solder for a solid connection. I recommend putting at least a 150 ohm resistor plus or minus 1/4 W between the positive signal line and the LED's longer "left leg," btw. Not all PCBs have built-in resistors for the LED so you need that extra hardware protection for the LED OR the LED may burn out quickly instead of after 15-20 years like it should The 150 ohm resistance is based on the 5V VCC/indicated power of most third party PCBs (which is true for all Brook PCBs and the Pico Fighting Board PCB I own). The plus or minus 1/4 W (power dissipation) is a bit overkill but better to be on the safe side where electricity is concerned! Most modders would recommend a 330 ohm resistor but that REALLY is overkill. A 150 ohm +/- 1/4W resistor is enough for the lifetime of the Turbo LED.
[NOTE: Always research the hardware and do some calcuations to see which parts you need to buy. The 5V power I saw from the diagrams for the PCBs in question. I had a part number for my LED and looked it up to find the fact sheet to figure out the voltage drop and current my LED supports. There's a website titled "LED Series Resistor Calculator" which has the formulas you can plug the power supply and LED values to figure out which resistor you need. People are lazy and just uses the 330 ohm resistor generically for LED support... If you're running off a 5V power PCB, a 330 ohm resistor is overkill. 150 ohm resistance +/- 1/4 W is enough for the major third-party PCBs that support Turbo LED.]
Oh, and don't forget heat shrink to cover the solder/welding joints between the signal wires and LED. It would be terrible to do all that work and have a short because 2 non-insulated solder joints touched!
To my knowledge, only the Brook PCBs and some Pico Fighting Board PCBs support Turbo LED. GeorgeC on Sep 11th 2023 -
Simple solve for extra buttons on UFB
When running some PS4 games through a Vewlix, I ended up needing a touchpad button for menus. This was a quick add that plugs right onto the Universal Fighting Board and worked on the first try. Unknown on Feb 14th 2022
-
Works really well with Brook WFB.
Added some extra buttons on my old Qanba Q4 for L3/R3/Tp functionnality and used this harness to link them to the new WFB I installed in it. Pefect fit. Simon Lahaye on Dec 28th 2019
-
Must need for those modded sticks (That hold the Universal Fighting Board)
Really cant go wrong with this, if you have the UFB. Simple installation, and works like a charm. Anthony (WhoisAnt) N. on Oct 10th 2019
-
Easy to install
All you just need is to plug it in your Brook Universal Fighting board and connect to the buttons and your ready to go. Is that simple and it's worth it! Geto B. on Aug 31st 2019
-
-
Find Similar Products by Category


