- Category
- What's New?
- FightSticks/Pads
- Joysticks
- Pushbuttons
- Spare Parts & Tools
- Hardware & PCB
- Electrical
- Customize
- Merchandise
- Sales & Clearance
- Brand
ULTIMATE GARAGE SALE: DISCOUNTS UP TO 90% [ SHOP NOW ]
Multiple Brands. No Max Quantity Limits. Sales are Final.


Razer Panthera Stickless PLUS Custom Art/Plexi Bundle
Price:
$64.95 (USD)
Brand
SKU
CUSTOM-BNDL-PANTHERA-STICKLESS-PLUS
Weight
0.01 Ounces
Availability
Ships within 1-2 business days
Shipping
Calculated at checkout
Current Stock
4
Choose Your Options
-
Product Description
Please Read Before You Order
Below is important information to know before placing a custom order with us:
- Project L Official Artwork: Do not submit the PNG samples. Instead, please download the zipped Photoshop PSD version, unzip the file and integrate them into our artwork templates
 for your desired fightstick model
 - Custom Orders do Not Ship Separately: If you place an order for a personalized product along with non-custom products, such as arcade part or merchandise, please note that all items will ship together.
Razer Panthera Dragon Ball FighterZ Version is No Longer Supported. Please do NOT purchase this item if you own the Dragon Ball FighterZ model. We have received numerous reports that the item does not properly fit the Razer Panthera Dragon Ball Fighterz Edition. While we initially assumed this model had cosmetic-only adjustments, we do not have access to this specific version of the hardware, and buying one is no longer financially tenable. We will not refund any customer that attempts to purchase this item despite the warning.Bundle Does not include Actual Fightstick
Please note that the Custom Art/Plexi Bundle only contains parts that complement the commercial Fightstick it is designed for. It does not include the Fightstick - this is purchased separately from Amazon, eBay or another vendor.
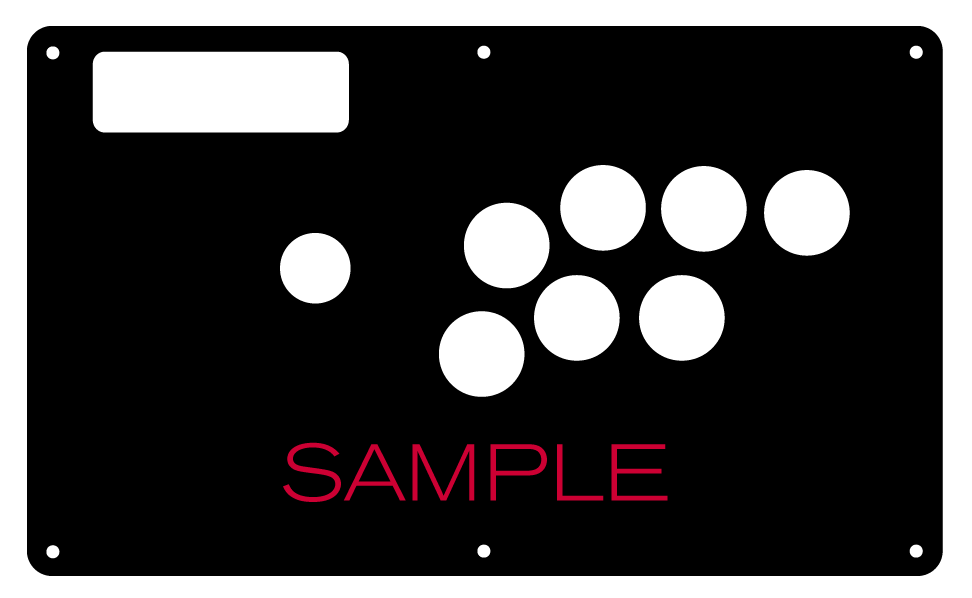
The fighting game community has enthusiastically embraced all-button - a unique arcade input control method that replaces the up, down, left and right directions with pushbuttons instead of a joystick lever. Thanks in part to AllFightSticks - makers of incredibly durable steel FightStick enclosures - you can now own a stick-less version of your favorite model.
Designed for Razer Panthera Models
Panthera (PS4, PS3) Stickless PLUS Panel Template (1.9Mb zip) ")
Compatible with these Razer Panthera Models. DBFZ version is no longer supported. Choose from 8 Layout Types
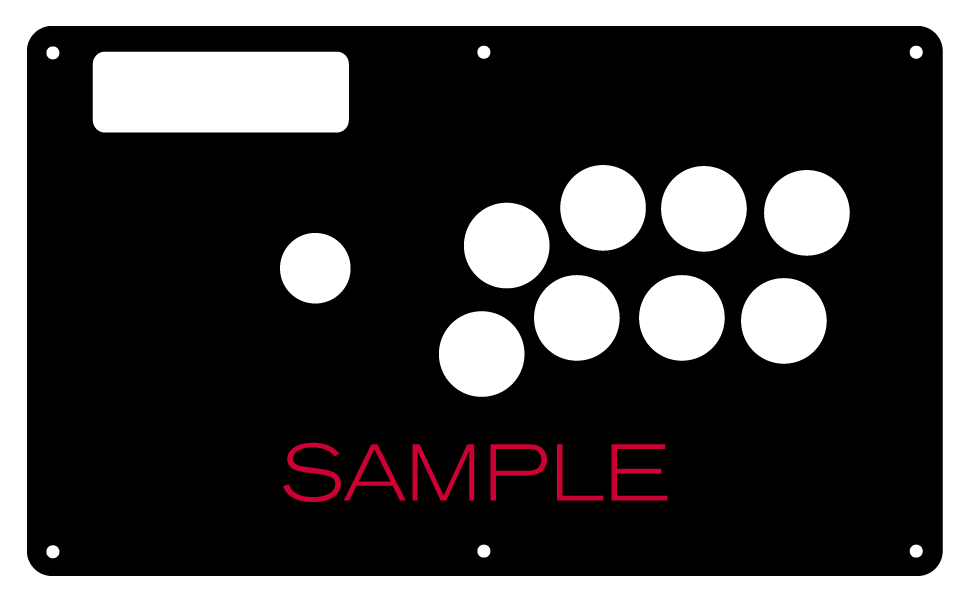
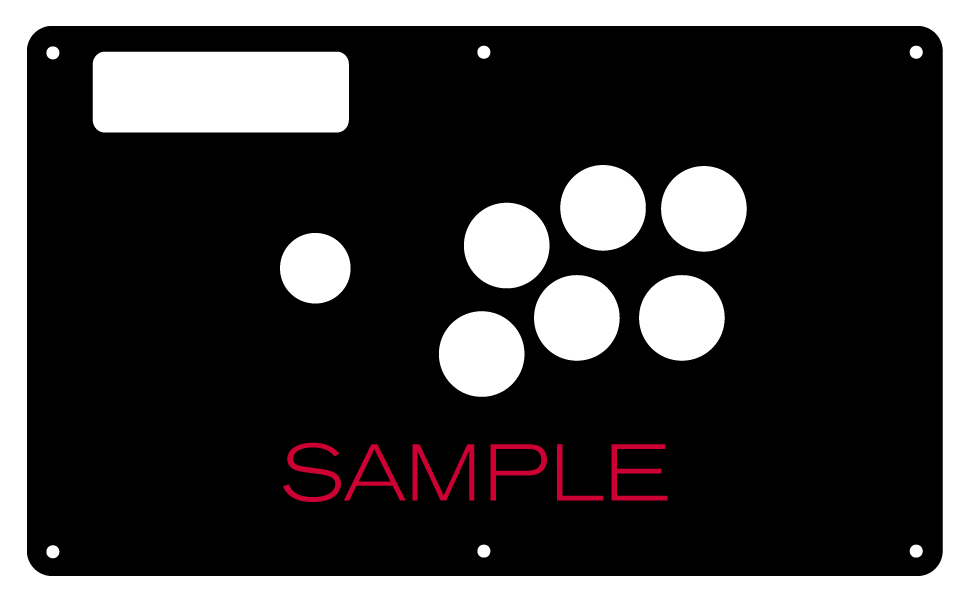
You can configure the Razer Panthera Stickless Plus with one of 8 layouts - Type A through H. Your artwork and plexi will be cut to the layout you choose. As mentioned, Type A-G will require purchasing and installing a replacement PCB, such as GP2040-CE (V5.6E - USB-B, USB-C) Open Source Multi-Console Fight Board, Brook Gen-5 Native PS4/PS5/Switch/Switch 2 + PC Fighting Board, Gen 5X, Universal Fighting Board, or other SOCD compliant controller PCB. Below is a list of layouts - one of which you can choose for your bundle:


TP Key for left pinkie, L3 for left thumb, and R3 for Right Thumb TP Key for left pinkie L3 for left thumb 


R3 for Right Thumb TP Key for left pinkie, and R3 for Right Thumb TP Key for left pinkie, and L3 for left thumb 

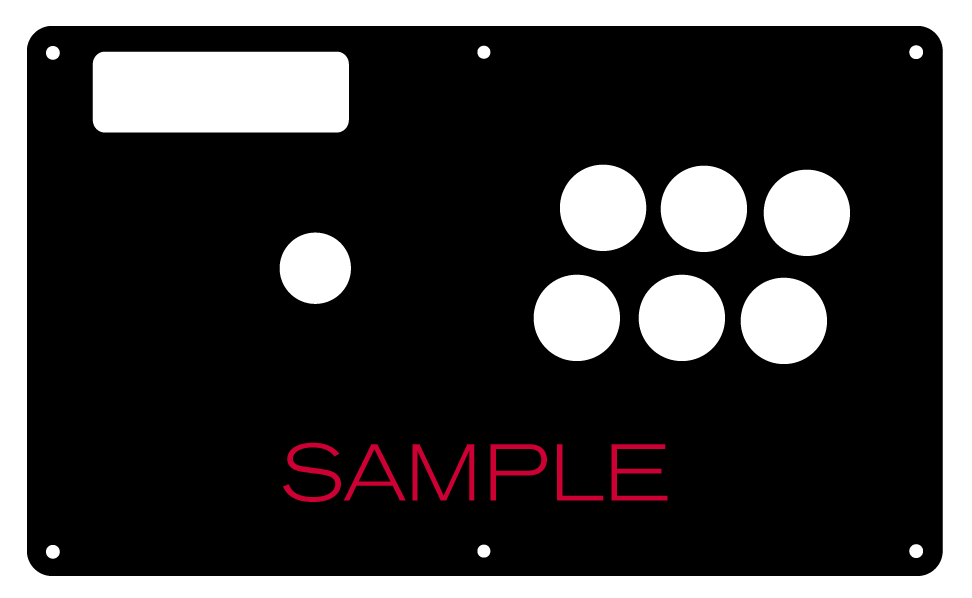
L3 for left thumb, and R3 for Right Thumb Traditional stickless 12 Button. Does not require GP2040 or Brook replacement PCB.
Uses 5-Pin to All-Button Conversion HarnessStickless PLUS adds L3, R3, TP Key Buttons, Requires GP2040-CE or Brook Replacement PCB and Harnesses
Orginally offered as a traditional 12 button leverless, Stickless PLUS caters to modern fighting games that take advantage of the Touchpad Key (TP Key), L3 and R3 buttons.
We offer 8 layout types for you. Type A through G will require purchasing and installing a replacement PCB, such as GP2040-CE (V5.6E - USB-B, USB-C) Open Source Multi-Console Fight Board, Brook Gen-5 Native PS4/PS5/Switch/Switch 2 + PC Fighting Board, Gen 5X, Universal Fighting Board, or other SOCD compliant controller PCB. You'll also need the following harnesses to connect these extra buttons to those PCBs:
- 5-Pin to All-Button Conversion Harness: For Types A-G, this will replace the original 5-pin lever harness that comes with your Panthera. You will connect this to the 20-pin harness that then attaches to your Brook or GP2040-CE PCB.
- 20-Pin Joystick/Button Harness: Connects your punch and kick buttons. The 5-pin joystick lever connector's female terminal attaches to your Brook or GP2040-CE PCB.
- 4-Pin L3/R3/Touchpad Button Harness for Brook Universal Fighting Board this adds L3, R3 and TP Key functions to your buttons. This also attaches to your Brook or GP2040-CE PCB.
You can purchase these as an exclusive bundle with the Razer Panthera Stickless Plus.
It's important to note that the GP2040-CE does have some limitations for PS4, as listed below:
- Playstation 4 (will time out after 8 minutes without DS4 control key or use of a converter device). Native PS4 requires an authentic DS4 control key, or the use of a Brook Wingman FGC Multi-Console to PS5/PS4/PC Converter, Mayflash Magicboots v1.1 USB or PXN N5 dongle with the USB passthrough adapter. Please note that there is no native PS5 support at this time, and only those PS5 titles that support legacy PS4 controllers will work.
- Native PS5 support (requires the newest firmware for GP2040-CE and more recent devices such Besavior P5General
 )
)
Stickless Plus Type H - CPT Compliant SOCD for Leverless Requires FA.SOCD Bundle
Should you wish to stick with a traditional 12-button leverless layout and do not wish to replace the PCB that comes with the Razer Panthera, you can choose Type H. The original Panthera has the TP Key, L3 and R3 buttons on its control panel. However, it is important to note that the Panthera's original PCB does not offer native SOCD control. Should you desire Capcom Pro Tour compliant control, which requires that leverless direction operates as UP+DOWN = NEUTRAL, then you should bundle the following three items in options:
- FA SO.CD Cleaner for All-Button Control v2
- Power Passthrough Harness for FA SO.CD - Razer Panthera
- All-Button Harness for FA SO.CD
You can purchase these items as an exclusive bundle with the Razer Panthera Stickless Plus.
What is SOCD?
Simultaneous Opposite Cardinal Direction, or "SOCD" represents the act of engaging two different directions at the same time. This is only possible with buttons, as a simple lever can only be one cardinal direction at once. To abide by fair tournament standards, this action is therefore "cleaned" using a SOCD cleaner, a PCB that uses logic to output a single direction or neutral based on those standards.
 The FA SO.CD control PCB is designed to "clean" multiple directional inputs to the March 2023 CPT accepted standard in a Fightstick that was not originally designed for all-button control. We now offer this device option should you desire to keep the original control PCB that came with your Fightstick. It is currently only available with purchase of a Stickless Conversion Bundle.
GP204-CE Has Built In SOCD
If you intend to purchase the GP2040-CE (V5.6E - USB-B, USB-C) Open Source Multi-Console Fight Board, it already has a built-in SOCD logic. You can access different forms of SOCD, which changes the direcctional output behavor when two buttons are pressed simultaneously.
Brook Devices with SOCD
If you are using a control PCB that already has SOCD (Simultaneous Opposite Cardinal Direction) cleaning built-in, such as most Brook multi-console control PCBs such as:
- Brook Gen-5 Native PS4/PS5/Switch/Switch 2 + PC Fighting Board
- Brook Universal Fighting Board FUSION (PS5, Multi Console)
- Brook PS5+ Fighting Board (PS5/PS4/PS3/PC)
- Brook Zero PI Fighting Board (PI/PS3/PS2/PSX/PC/Switch)
- Brook PS4 Fighting Board Plus (PS4/PS3/Switch/PC)
- Brook PS4+ Fighting Board with Audio v2017 (PS4/PS3/Switch/PC)
- Brook PS3/PS4/Switch Wireless Fight Board
Then you do not need the FA SO.CD.
Not Concerned about SOCD?
If you do not need CPT compliant SOCD cleaning - meaning that you are not concerned whether UP + DOWN = NEUTRAL - then you can instead purchase 5-Pin to All-Button Conversion Harness separately. Attach this to the original 5-pin harness that was connected to your joystick lever.
Save Over Purchasing Separately
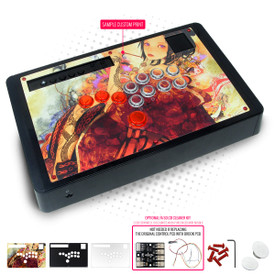
This discounted bundle includes your replacement panel, plus custom artwork print, and blank plexi. Finally, you'll score special bonus items such as the Buttercade SnapOuts for 24mm and 30mm.
- Razer Panthera Custom Replacement Panel - Stickless Layout ($34.95 Value)
- Stickless Replacement Plexi Panel ($16.95 Value)
- Buttercade SnapOut Button Tools: 30mm and 24mm ($15.95 Value)
- Custom Printed Artwork ($14.95 Value)
- Choice of Color Anodized Hex Screws + 2.5mm Long Arm Hex Key) ($4.25 Value)
- Klear Screen Detailer Pack For Plexiglass ($1.25 Value)
Durable Steel Panel, Matte Finish
Each AllFightSticks panel is constructed out of steel, with a protective black powdercoat, providing a matte-like texture that can also manage wear and tear.
Option Guide Often, you will have several options to personalize your control panel. Note: Not every option will apply to your Fightstick model.
Layout Configuration
Each Fightstick has its own characteristics, with some sharing similar elements, such as the popular Vewlix button layout. We will specify what options are available for each Fightstick. Below are the most common button layout configurations:
 8 Button VewlixFirst 6 ButtonsLast 6 Buttons7 Button Vewlix
Removing Default Elements
Some Fightsticks, such as the popular MadCatz TE, offer additional personalization options by removing default elements such as control panel, start button, or screws. Cut options are defaulted to their authentic counterpart, displayed as [YES (default)] in the options list. For example, a MadCatz TE, the default configuration is to have the turbo/guide portion of the control panel cut, so that the control panel can fit properly. You have the option to select [NO] to prevent cutting these areas.
![Cut Control Panel? [NO]](http://support.focusattack.com/attachments/token/ioB7e1jzIXfxKdM8KJPKKzvKD/?name=sample-8button-noturbo.png)
![Cut Start Buttons [NO]](http://support.focusattack.com/attachments/token/SWbsx5sVHYupnBQ5iuZH1S2HK/?name=sample-nostart.png)
![Cut Middle and/or Bottom Screws? [NO]](http://support.focusattack.com/attachments/token/QzFj5pc5cNNHkOKrzlEMcc0I4/?name=sample-8button-nomiddlescrew.png) Cut Control Panel? [NO]Cut Start Button? [NO]Cut Middle and/or Bottom Screws? [NO]
Cut Control Panel? [NO]Cut Start Button? [NO]Cut Middle and/or Bottom Screws? [NO]
Cut Control Panel? [NO] - If you own a MadCatz TE, and installed a PS360+, you may no longer need the Turbo/Guide area of the control panel, located at top left. This option allows you to remove the Turbo/Guide portion. Please note that you MUST remove the actual control panel on the TE by unscrewing it before applying the plexi, or you risk damaging the plexi. Also, please make certain to select this option if you are also choosing to have artwork printed, or the plexi and artwork won't match.
Cut Start Button? [NO] - On some joysticks - such as the Qanba Q4 - the start button is directly on the panel. You can select to have this removed. You can also select this should you desire a panel similar to the Eightarc Fusion or Synthesis series Fightstick, as the start button is moved elsewhere. Again, this option is available on specific joysticks.
Cut Middle and/or Bottom Screws? [NO] - Selecting "no" on this option allows you to remove the middle top and bottom screw holes on specific joysticks, either for a cleaner appearance or to avoid rubbing your wrist against the screw. Please reconsider this option if you intend to have a full panel etch on your plexi, as etching physically changes portions of the plexi due to heat. In this case, it is best to leave the screw holes in place in order to keep the panel securely positioned.
Cut Button Inserts

Pushbutton manufacturers such as Sanwa, Seimitsu, Crown and GamerFinger have each produced specific models with a clear or translucent plastic cap and flat plunger. These are often used to display a graphical insert, allowing you to enhance the button's appearance. That said, each button manufacturer has designed the artwork cap with a different diameter than their competitors. For example, GamerFinger's artwork cap has a diameter that is slightly larger than Seimitsu or Sanwa. An insert cut for a Sanwa artwork cap will fit loosely when inserted into the GamerFinger artwork cap. This is an undesirable result that can produce a white or colored ring around the insert.
Now, you can choose the button insert cut to match the pushbutton you intend to use. This allows the insert to fit snugly within the cap.
Brands and Model with Artwork Caps
- Sanwa - OBSC (30mm) | OBSC (24mm)
- Seimitsu - PS-14-GN-C (30mm) | PS-14-DN-C (24mm) | PS-14-K (30mm) | PS-14-KN (30mm) | PS-14-DN-K (24mm)
- Seimitsu - ALUTIMO SSPS MX 24mm and 30mm
- Crown - SDB-201-C, SDB-202 MX (30mm) | SDB-202-MX (24mm)
- Qanba - GRAVITY 24 and 30mm
- GamerFinger - HBFS30 (30mm) |HBFS24 (24mm)
In some instances, a button brand or model does not have a 24mm equivalent with art cap. In this case, we will cut to the default size of Sanwa 24mm insert.Please note that if you later intend to purchase a different button, you may need to get new button inserts or new artwork. If you are uncertain which button you may choose, Sanwa is chosen by default.
Button Cut for Qanba Q2 Glow
 Qanba Crystal and Q2 Glow feature buttons manufactured by Qanba. These buttons have a smaller cap diameter, and thus require a smaller artwork insert. If you plan to keep the Qanba Crystal or Q2 Glow buttons installed when updating your artwork, please choose the option "Crystal/Q2 Glow".
24 vs 30mm
When processing orders, a frequent mistake we found among new players is choosing the wrong size for action buttons, such as punch and kick.
Within the fighting game genre, Japanese arcade buttons commonly consist of two diameter sizes: 24 millimeter and 30 milllimeter (mm). In most configurations, 30mm represents your action button. These are front facing, appearing most prominent on your Fightstick control panel. Option button, such as "Start", "Select", or more recently "Option", "Touch", or "Share" are usually 24mm.
UPDATE: Owners of Neo Geo AES Joysticks will need 24mm pushbuttons instead of 30mm (Thanks SRK's DEZALB)
Below is a visual representation of a common Fightstick control panel. Throughout this article, we will mark 24mm in green, and 30mm in Orange.

Checking the Proper Size
 Another way that players can misinterpret the pushbutton size is by measuring the pushbutton plunger. Have a look at the diagram at right.
The plunger - the part that you press down to represent an input - is 25mm or a bit smaller in most 30mm pushbuttons. Often this leads to the conclusion that one needs a 24mm button and not 30mm.
Similarly measuring the button rim can lead to confusion, as it is intentionally larger than the button hole it is placed in. You don't want to use these measurements. Instead, review the button housing diameter, or the hole the button will be placed in. You can do this with a caliper - a digital caliper is often quite helpful for this and other arcade-related projects.
Control Panel Configuration
Most Fightsticks from MadCatz, Hori, Qanba, and similar will use these two sizes. How the buttons are used will depend on the model joystick that you own. Over time, we'll provide example configurations for specific popular Fightstick models and arcade cabinets using the color key for 24mm (green) and 30mm (orange). We'll also expand the key for future models if another size is introduced, and we offer for sale.


Image Edit If you would like to use a free, online Photoshop-like app to check out whether your artwork will work with a layout we offer, I highly recommend Photopea
This amazing app works with our PSD templates and is a great way to preview your artwork or create new art files. It also exports to PSD, which is the format we recommend for submitting artwork.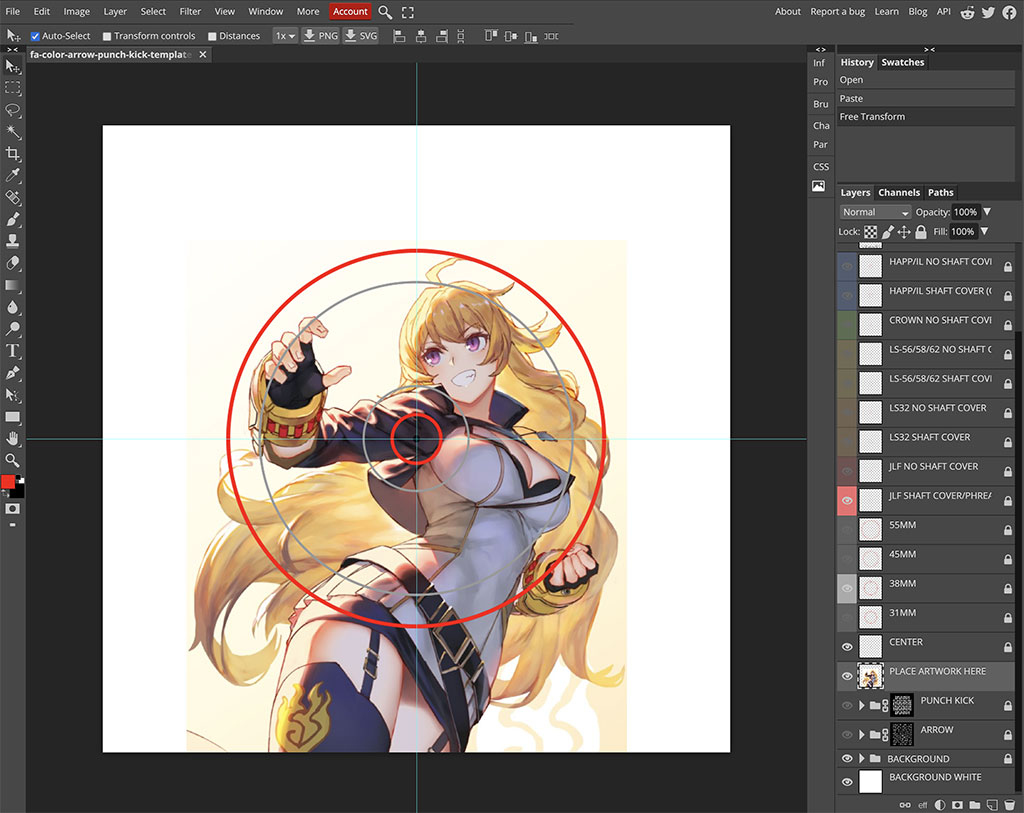
Support New to FA Plexworks?
Click the "Options" tab for a detailed explanation of each customization option available to you. Using a mobile device? Click here to scroll to the descriptions.
Artwork templates
We offer a photoshop template for each custom artwork or custom plexi etch. Click the "Description" tab (or scroll up if on mobile device) to display the template and download. You can also click here to access our repository and download artwork and etch templates (in Photoshop PSD format) for your desired model and others.
Important: Using templates outside of the ones we provide may produce unwanted output. We are not responsible for output generated from unsupported templates. More information here.
Warranty and Support for FA Plexworks Custom Order
Custom orders cannot be returned for refund, or exchanged for another custom order. Orders damaged upon arrival are subject to special terms within our return policy. Please see our FA Plexworks FAQ for more information about our Plexworks return policy and related Q&A.
If you have not used our Plexworks custom services before, we recommend that you visit our support section for updated information, helpful tips, and resources to get the best output.
Some useful sections to review before making your purchase (will open in new browser window or tab):
- Learn about our Custom Job Tracker to keep tabs on your custom order while staff processes it from start to finish.
- Save time getting answers by visiting our FAQ.
- Learn more about the personalization options available to you.
- Hire a skilled artist from the Fightstick Artists Network to visualize your idea.
- Handling the artwork yourself? Review our requirements and get tips to optimize your laser etch or artwork submission.
- Learn about additional products and services we offer under FA Plexworks.
- Project L Official Artwork: Do not submit the PNG samples. Instead, please download the zipped Photoshop PSD version, unzip the file and integrate them into our artwork templates
-
Product Reviews
-
Product Videos
-
 How To: Install FA/AllFightsticks Razer Panthera Stickless Conversion KitThe Razer Panthera is a tricky Fightstick to add an all-button...
How To: Install FA/AllFightsticks Razer Panthera Stickless Conversion Kit
The Razer Panthera is a tricky Fightstick to add an all-button layout. FA's Joe Howell (aka NGN | NooGoodCitizen) provides a step-by-step tutorial that provides - in painstaking detail - all that you need to install AllFightsticks conversion panel, plus FA's SO.CD Cleaner for All-Button Control, wiring, custom artwork and plexi. The FA/AFS Stickless Conversion kit is available now at FA! https://focusattack.com/razer-panthera-stickless-custom-art-plexi-bundle/ Artwork Template: https://focusattack.com/template/download/plexworks/brand/razer/fa-razer-panther-stickless-artwork-template.zip -
-
Find Similar Products by Category